Getting Started with OpenCV in Visual Studio 2005

Step 1: Create a new project.
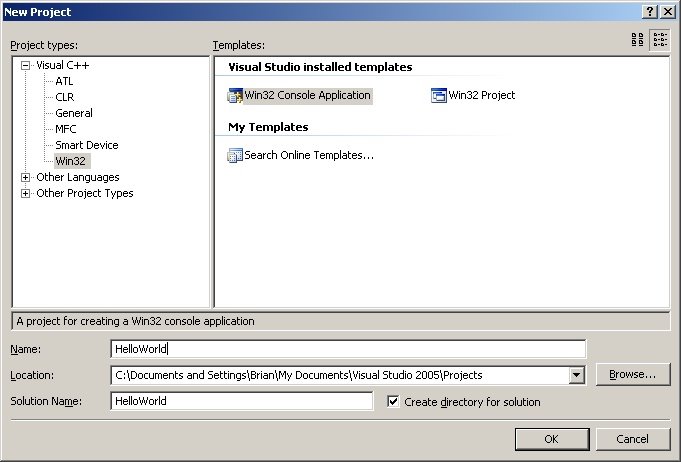
Step 2: Select Win32 Console Application

Step 3: We want an Empty project

Step 4: Done creating the project

This is what your project screen should look like at this point.

Step 5: Create a new item

Step 6: Create a C++ file, the name is your choice.
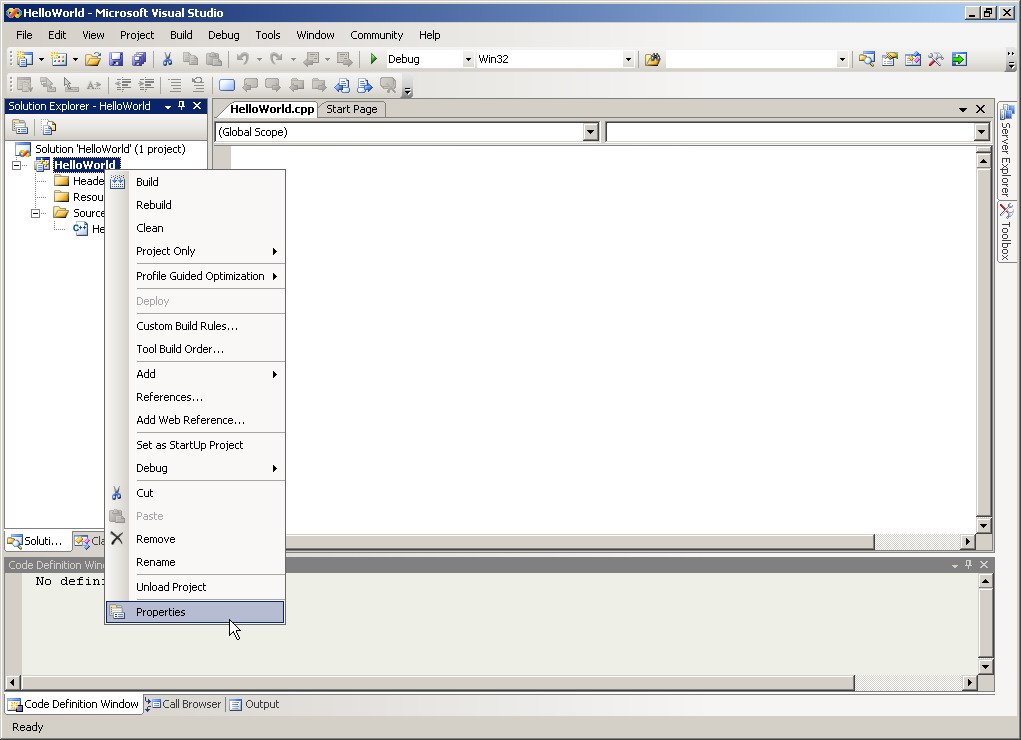
Step 7: Modify the project properties
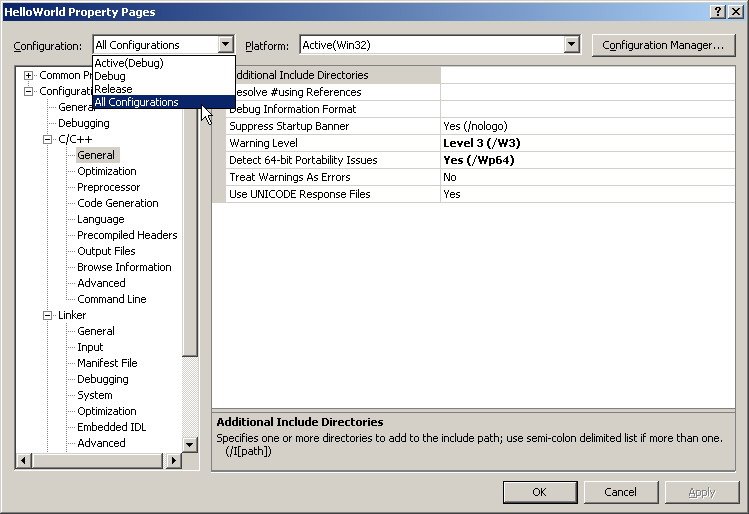
Step 7: Select All Configurations
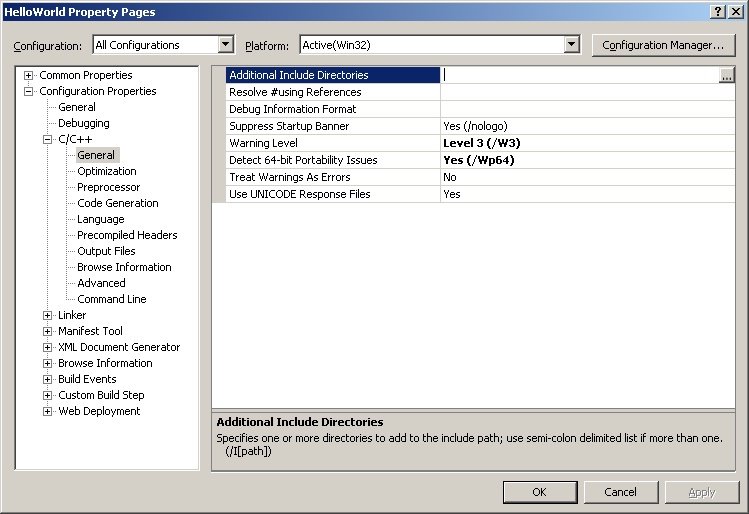
Step 9: Go to Configuration Properties / C/C++ / General / Additional Include Directories

Step 10: Enter the path to your include files: For default OpenCV install location, they are
"C:\Program Files\OpenCV\cvaux\include\";"C:\Program Files\OpenCV\cxcore\include\";"C:\Program Files\OpenCV\cv\include\";"C:\Program Files\OpenCV\otherlibs\highgui\";"C:\Program Files\OpenCV\otherlibs\cvcam\include\"
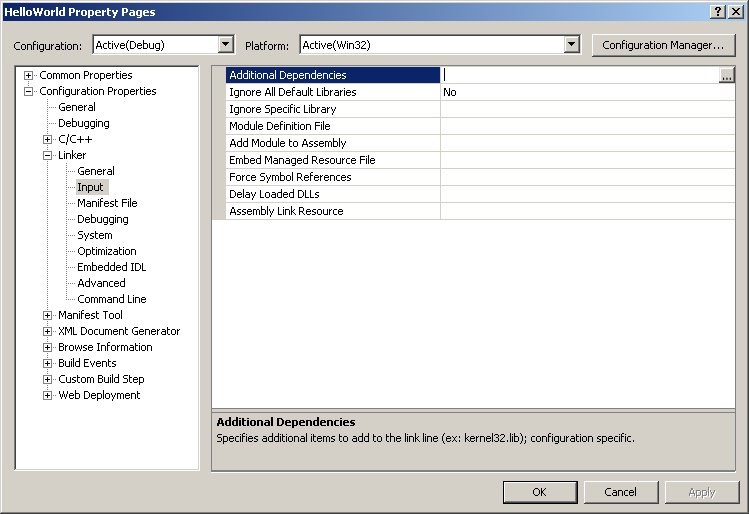
Step 11: Go to Configuration Properties / Linker / Input / Additional Dependencies

Enter the path to all the relevant cv libs. For a default install, this is:
"C:\Program Files\OpenCV\lib\cv.lib" "C:\Program Files\OpenCV\lib\cxcore.lib" "C:\Program Files\OpenCV\lib\cvaux.lib" "C:\Program Files\OpenCV\lib\highgui.lib"(notice the spaces instead of ; marks)

Write some code

Click on "Start Debug"

Hello World in OpenCV
posted by Brian at 2:57 AM
![]()
5 Comments:
Thank you for your blog. You have step 10 repeated twice. You are also missing:
Add the additional library directories:
"C:\Program Files\OpenCV\lib"
"C:\Program Files\OpenCV\bin"
And adding "C:\Program Files\OpenCV\bin" to the PATH in the "Environment Variables"
I hope that helps improve your page.
Thanks again.
Great tutorial. Thanks!
Really helpful. Thanks for the post.
quite helpful.Thanks!
thx..^^
Post a Comment
<< Home